Starting with the safest approach to cleaning old wood
The safest way to clean old wood furniture is to start with the mildest possible method and stop as soon as the surface is clean. Decades of dust, handling, and airborne oils can make a treasured piece look cloudy or dark, but aggressive chemicals can permanently dissolve antique finishes. Before applying any liquids or commercial cleaners, carefully vacuum all crevices, carvings, and joints using an upholstery brush attachment to remove dry debris without dragging grit across delicate wood fibers.
Once loose particles are cleared, wipe the piece down using a clean, soft microfiber cloth slightly dampened with lukewarm water. The cloth must be wrung out until it is barely damp, as excess moisture can quickly seep into crazed varnish, hairline veneer cracks, or unsealed joints and cause swelling. Work in straight lines following the natural direction of the wood grain rather than in circular motions, which can leave faint swirl marks in softened topcoats.
If a plain damp cloth leaves behind stubborn grease or sticky residue, add a few drops of mild vegetable-based soap or pH-neutral liquid dish soap to a bowl of warm water. Dip your cloth into the soapy water, wring it out until almost dry, and wipe one small section at a time. Immediately follow with a second cloth dampened only with plain water to lift residual soap film, then buff the area completely dry with a fresh cotton towel before moving on.
Identifying the existing finish before touching the surface
Before selecting cleaning agents or restorative polishes, you must understand what coating protects the underlying timber. Antique pieces crafted before the mid-nineteenth century were commonly finished with shellac, hand-rubbed linseed oil, or simple beeswax layers, whereas late Victorian and early twentieth-century furniture often features natural gum varnishes or nitrocellulose lacquer. Each substance reacts differently to solvents, moisture, and friction, meaning an approach that revives one finish could liquefy another.
To identify the finish safely, test an inconspicuous spot such as the inside edge of a back leg or the underside of an apron. Place a single drop of denatured alcohol on the surface; if the finish softens and becomes tacky within a few seconds, it is almost certainly shellac. If alcohol has no effect, test a separate hidden spot with a drop of lacquer thinner; lacquer will dissolve quickly under this solvent, while cured oil varnishes and polyurethane will remain largely unaffected.
Understanding whether you are dealing with shellac, lacquer, or cured oil prevents catastrophic mistakes during routine care. For example, cleaning an old shellac finish with alcohol-based sanitizers or household window sprays will instantly turn the surface gummy and white. When you browse selections at dedicated antique furniture stores, you will notice that original finishes retain an amber warmth and subtle surface texture that modern synthetic coatings simply cannot duplicate.
Removing decades of built-up grime and wax safely
When mild soap and water fail to remove built-up grime, the culprit is often layers of contaminated old wax, kitchen grease, and soot. In these situations, odorless mineral spirits—also sold as paint thinner—serves as one of the most effective and gentle cleaning agents available. Mineral spirits dissolve wax, grease, and oily soil without softening underlying shellac, varnish, or cured lacquer, making it a standard solvent in museum-grade furniture conservation.
To clean heavy buildup, dampen a soft cotton cloth or clean cheesecloth with mineral spirits and wipe gently along the wood grain. As the solvent cuts through the accumulation, you will see a brownish-gray residue transfer onto the cloth. Rotate the rag frequently to fresh surfaces so you do not smear dirty solvent back onto adjacent boards, and work in a well-ventilated space away from open flames.
Never use steel wool or abrasive scrubbing pads during this deep-cleaning stage unless the finish is already ruined and scheduled for a total strip. A soft-bristled artist brush dampened with mineral spirits works wonders for cleaning intricate moldings, turned legs, and carved details. Once the entire piece has been wiped clean, allow the surface to air-dry completely for an hour before assessing whether further conditioning or waxing is required.
Addressing white rings, haze, and water marks
White rings and cloudy patches on tabletop surfaces are among the most common complaints owners bring to restoration specialists. These milky blemishes occur when moisture penetrates the microscopic pores of a wax or lacquer finish and becomes trapped beneath the top surface without penetrating the underlying wood. Because the wood itself is not stained, these surface defects can frequently be corrected without stripping the piece down to bare lumber.
For fresh water rings, applying gentle, dry heat can coax the trapped moisture back out into the air. Place a dry cotton towel or clean t-shirt flat over the white ring, then run a household iron set to low or medium heat—without any steam—over the cloth in continuous, sweeping strokes. Check the wood every fifteen seconds to monitor progress; warming the finish softens it slightly, allowing the water vapor to evaporate and restoring clear visibility through the topcoat.
If heat does not resolve the blemish, a very mild abrasive paste can polish away the micro-layer of damaged finish. Mixing a tiny amount of non-gel baking soda with cooking oil or blending fine cigar ash with mineral oil creates an ultra-fine polishing paste. Rub this paste very lightly along the grain over the white mark using your fingertip or a soft cloth, wiping it away periodically to inspect your work, and stop immediately once the cloudiness disappears.
Selecting the right polish and protective wax
Finding the best antique furniture polish means stepping away from liquid chemical sprays and embracing traditional paste wax. High-quality paste waxes made from blends of natural beeswax and hard carnauba wax provide the most authentic, durable protection available for historical furniture. Wax creates an ultra-thin, sacrificial barrier that repels moisture, resists dust adhesion, and fills fine microscopic scratches without altering the chemical composition of the original finish beneath it.
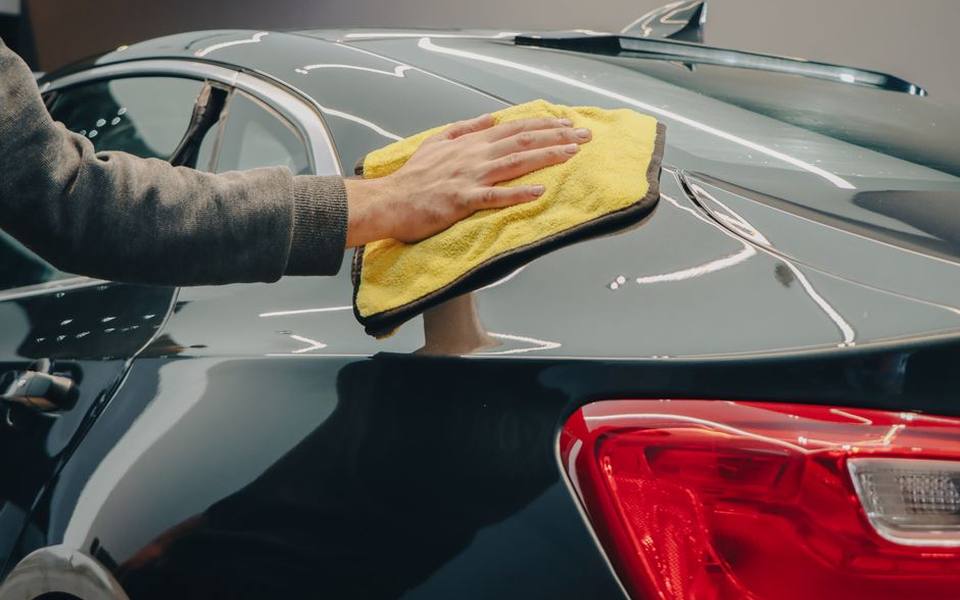
To apply paste wax properly, scoop a tablespoon of wax into the center of a clean cotton cloth, fold the fabric over it, and knead it until the wax begins to seep through the weave. Rub a thin, uniform coat across the timber, working in small sections so the wax does not dry unevenly. Applying wax too thick is the most common homeowner mistake; excess wax creates a sticky, smeary film that attracts dirt rather than repelling it.
Allow the applied wax to haze over for roughly ten to fifteen minutes, depending on the ambient room temperature and humidity. Once the surface looks matte, buff vigorously with a soft flannel cloth or a clean horsehair shoe-buffing brush to produce a deep, warm sheen. High-traffic items like dining tables typically need waxing once or twice a year, while accent cabinets and chests only require fresh wax every two to three years.
The truth about aerosol sprays and silicone polishes
Many popular commercial furniture polishes sold in grocery stores contain silicone oils, synthetic scents, and petroleum distillates that cause significant long-term harm to antique finishes. Silicone provides an instant, artificial shine that looks impressive for a few days, but it slowly penetrates crazed varnish and binds directly to the wood fibers. Once silicone enters the cellular structure of old timber, it is virtually impossible to remove completely.
The presence of silicone contamination creates severe complications if a piece ever needs repair, touch-ups, or professional refinishing down the road. New coats of lacquer, varnish, or paint cannot adhere to silicone-contaminated wood, resulting in a widespread cratering defect known in the trade as fish-eye. Professional refinishers often charge premium rates or decline work altogether when a tabletop has been repeatedly treated with aerosol dusting sprays over several decades.
Furthermore, liquid polishes containing mineral oils leave an oily, wet residue that does not fully cure or harden. This tacky film acts like a magnet for airborne dust, pet dander, and cooking fumes, quickly transforming into a dark, gummy layer that obscures the natural grain of the wood. When shopping at antique malls or estate sales, you can often spot pieces treated with liquid oils by their fingerprint-prone, smeary surfaces that feel slick rather than satin-smooth.
When to clean, when to revive, and when to refinish
Every antique owner eventually faces the decision of whether to preserve an existing finish or undertake a complete refinishing project. As a general conservation rule, original finish should be saved whenever possible because it represents a tangible record of the object's age, history, and craft. An old finish with minor crazing, softened edges, and shallow scratches carries authentic patina that gives antique wood its distinctive character and collector appeal.
Cleaning and reviving are appropriate whenever the original finish remains firmly bonded to the wood substrate. If seventy to eighty percent of the clear coat is intact, a thorough cleaning with mineral spirits followed by paste wax will often restore ninety percent of the piece's beauty without disturbing its historical integrity. Surface scratches can often be disguised using colored paste wax or dedicated touch-up blending pens that match the wood undertones.
Total refinishing becomes necessary only when the protective coating has completely failed, flaked away, or suffered severe physical trauma. If water has caused widespread black staining deep in the raw wood, if paint was crudely splattered over fine mahogany, or if extensive veneer lifting requires structural gluing, stripping the damaged surface may be the only path forward. Even then, careful mechanical removal is far preferable to harsh chemical immersion dip tanks that dissolve delicate animal glues.
Understanding professional furniture refinishing costs
When a piece does require complete restoration, furniture refinishing costs depend on size, structural complexity, carving density, and regional labor rates. In most states, professional wood restorers bill between fifty and one hundred twenty dollars per hour, reflecting the specialized hand labor, safety equipment, and curing times involved. Simple projects such as refinishing a basic side chair typically cost between one hundred fifty and three hundred dollars, depending on spindle count.
Table refinishing costs vary dramatically based on the table style, number of extension leaves, and surface condition. A standard two-piece side table or nightstand typically runs between two hundred and four hundred fifty dollars, whereas refinishing a large formal dining table with four leaves typically ranges from eight hundred to two thousand dollars or more. If the tabletop features intricate marquetry, fragile burled veneers, or deep gouges that require custom grain-matching, prices increase accordingly.
Dressers, breakfronts, and desks represent larger investments because every drawer front, interior runner, and side panel requires individual preparation. Refinishing a four-drawer chest typically costs between six hundred and twelve hundred dollars, while complex secretary desks with pigeonhole compartments can easily surpass fifteen hundred dollars. Before commissioning work, request written quotes that clearly distinguish between surface chemical stripping, structural veneer repair, and the final topcoat application.
Assessing historical value before stripping a piece
Stripping the original finish from an authentic eighteenth- or nineteenth-century American or European antique can instantly reduce its commercial value by half or more. Serious collectors and museum curators prize original surfaces, including the minor dents, darkening, and wear patterns that accumulate over a century of genuine domestic use. Stripping a piece down to raw lumber removes this irreplaceable history and leaves the wood looking flat, modern, and bleached.
Before making an irreversible decision to strip an unusual chest, chair, or table, consider consulting professional appraisal services to determine its origin and provenance. Certified appraisers can evaluate maker marks, joinery methods, and hardware to verify whether the piece was produced by a recognized cabinetmaker or represents a rare regional folk art style. An item that appears worn or tired to an untrained eye may actually carry significant secondary market value precisely because its surface remains undisturbed.
If you discover through appraisal or research that a piece is a mass-produced mid-twentieth-century reproduction, complete refinishing carries little financial downside and can produce a stunning functional centerpiece for your home. However, if you plan to sell through antique consignment shops, keeping an original finish intact—even with visible age wear—often attracts higher offers from experienced dealers than a freshly stripped piece finished with modern high-gloss polyurethane.
Long-term maintenance and indoor climate protection
Once your antique wooden furniture is clean and properly protected with wax, ongoing maintenance requires surprisingly little physical effort. Dust the surfaces weekly using a dry, lint-free microfiber duster or an electro-static cloth, avoiding heavy downward pressure that could grind ambient dust particles into the wax. Liquid cleaners and damp cloths should only be brought out when actual spills, sticky food residue, or oily fingerprints occur.
Environmental stability is far more critical to the longevity of antique wood than any bottle of polish. Wood is a hygroscopic material that continuously absorbs and releases ambient moisture, expanding across the grain during humid summers and contracting during dry winters. Aim to keep indoor relative humidity between forty and fifty percent year-round; running a humidifier during winter heating seasons prevents veneer checking, joint separation, and warped tabletops.
Finally, protect your furniture from direct ultraviolet exposure and localized heat sources. Placing an antique walnut credenza directly over a forced-air floor vent or beside a radiator dries out historical animal glues and causes rapid finish deterioration. Similarly, direct afternoon sunlight filtering through unshaded windows will bleach natural wood pigments and turn dark cherry or mahogany into a faded, washed-out yellow within just a few seasons.
Published 2026-09-20 · reviewed with each rebuild, last September 2026.
Find antique stores near you
The directory lists 25,996 antique stores by state and city — pick your state or use the “Near me” button in the header.
More guides
-
 Owning
Cleaning and Polishing Antique Silver Without Damaging the Patina
-
 Money
MoneyNavigating the Market for Vintage Currency
-
 Owning
Evaluating, Using, and Displaying Mid-Century Glassware and Kitchen Antiques
-
 Buying
Navigating Vintage and Antique Jewelry Styles
-
 Owning
How to Clean and Care for Silverware Without Causing Damage
-
 Owning
Vintage Pyrex Value and Safety Guide: Understanding Collector Patterns and Usage
-
 Buying
A Guide to Sourcing Vintage and Estate Jewelry
-
 Money
MoneyValuable Baseball Cards Guide: Spotting Vintage Sports Collectibles
-
 Owning
How to Clean and Restore Antique Wood Furniture
-
 Money
MoneyHow to Find and Use Antique Price Guides Online
-
 Money
MoneyHow to Determine the Value of Old Books and First Editions
-
 Money
MoneyWhere and How to Sell Vintage Coins for the Best Return
-
 Buying
Choosing and Caring for Vintage and Modern Cast Iron Cookware
-
 Owning
How to Polish and Value Antique Silverware at Home
-
 Owning
How to Clean and Polish Antique Wood Furniture Without Damaging It
-
 Buying
Vintage and Classic Cast Iron Cookware: Buyer's, Value, and Care Guide
-
 Buying
Antique Silverware, Vintage Jewelry, and Collectible Coins Guide
-
 Money
MoneyA Practical Guide to Antique Price Guides and Rare Book Valuations
-
 Owning
How to Clean, Polish, and Refinish Antique Wood Furniture
-
 Owning
Ultimate Guide to Vintage and Antique Cast Iron Cookware: Brands, Seasoning, and Care
-
 Owning
How to Clean, Polish, and Value Vintage Silverware and Antique Jewelry
-
 Buying
Valuing Vintage Collectibles: From Rare Dolls and Slot Machines to Classic Lamps and Churns
-
 Owning
How to Clean, Polish, and Refinish Antique Wood Furniture
-
 Money
MoneyVintage Glassware Value Guide: Pyrex, Depression Glass, CorningWare, and Bottles
-
 Money
MoneyAntique & Vintage Price Guides: How to Value Antiques and Collectibles
-
 Buying
How to Value Old Books and First Editions: A Collector's Price Guide
-
 Money
MoneyWhere and How to Sell Vintage Records and Audio Equipment
-
 Buying
How to Buy, Value, and Sell Vintage Coins: A Practical Beginner's Guide
-
 Buying
Estate Sale Guide: How to Find, Buy, and Liquidate Antiques
-
 Buying
Vintage and Modern Cast Iron Cookware: Identification, Seasoning, Buying, and Care
-
 Money
MoneyComprehensive Guide to Antique Values, Old Books, and Collectibles Pricing
-
 Owning
Cleaning and Caring for Vintage Silverware, Fine Jewelry, and Antique Metals
-
 Owning
How to Clean, Polish, and Refinish Antique Wood Furniture
-
 Buying
Vintage and Modern Cast Iron Cookware: Identification, Caring, and Buying Guide
-
 Owning
Antique Silverware: Cleaning, Polishing at Home, and Value Guide
-
 Buying
Vintage Pyrex, Glassware, and Depression Glass Identification and Value Guide
-
 Money
MoneyAntique Price Guides: How to Value and Sell Antiques Online and Offline
-
 Money
MoneyCollectible Old Books and First Editions: Valuation and Identification Guide
-
 Buying
Vintage Sewing Machines, Stoves, and Antique Tools Value Guide
-
 Buying
Collector Guide to Vintage Door Hardware, Knobs, and Cabinet Pulls
-
 Owning
Antique & Vintage Dolls: Values, Identification, and Care
-
 Buying
Antique Hoosier Cupboards and Vintage Desks: History, Identification, and Value
-
 Service
Grandfather, Wall, and Pocket Clock Repair and Identification Guide
-
 Owning
Antique Rotary Telephones and Landlines: Buying, Restoring, and Converting
-
 Owning
Collecting Vintage Picture Frames and Oil Paintings: Framing and Restoration
-
 Buying
Antique Sewing Machines and Spinning Wheels: Value, Brands, and Maintenance
-
 Buying
Antique Wood Stoves and Log Burners: Buying, Safety, and Restoration Guide
-
 Buying
Depression Glass and Antique Canning Jars: Identification and Values
-
 Buying
Vintage Mirrors: Identifying, Buying, and Styling Antique Glass
-
 Owning
Antique Silverware and Silverplate Flatware: Cleaning, Identification, and Value
-
 Buying
Vintage Engagement Rings and Art Deco Jewelry: Buying and Valuation
-
 Buying
Buyer Guide to Vintage and Antique Furniture: Seating, Tables, Desks, and Reproductions
-
 Buying
Collector Guide to Vintage Toys, Lighters, Sports Ephemera, and Curios
-
 Buying
Architectural Salvage Guide: Sourcing Stained Glass, Mantels, and Historic Hardware
-
 Buying
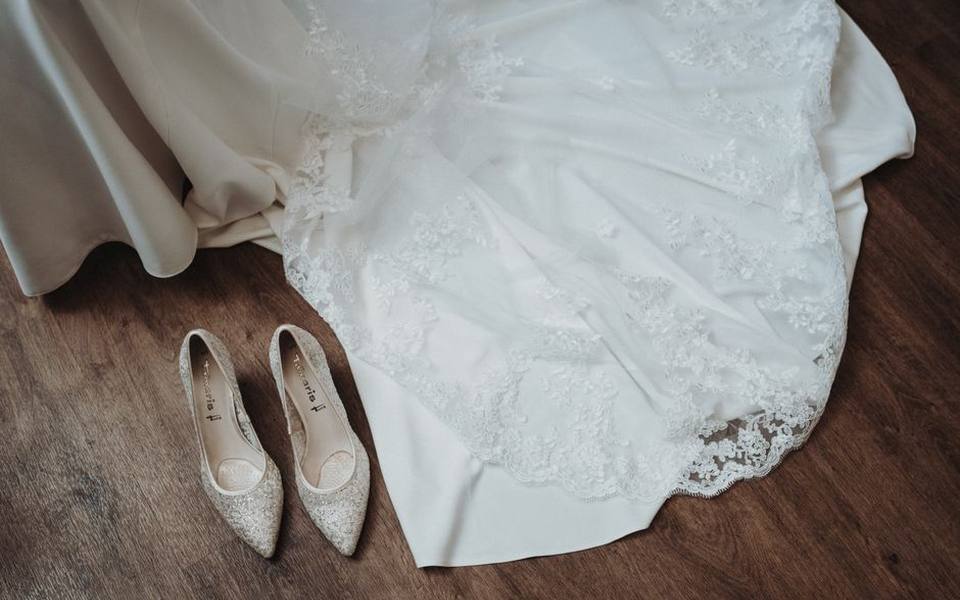
Vintage Fashion and Heirloom Style: Sourcing Dresses, Denim, Leather, and Ephemera